
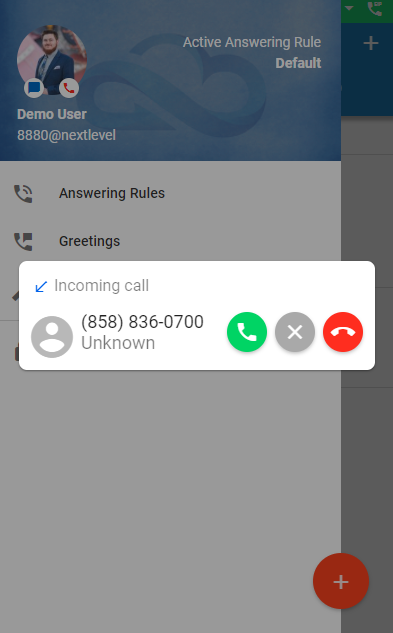
When you receive an inbound call, you will see an overlay on the WebPhone with the Caller ID Number, with the option to Answer, Ignore, or Reject. You will also see a notification pop up near the bottom right of your screen.
- Press Answer to accept the call.
- Click Ignore to silence the ringing and ignore the call
- Press Reject to send the call immediately to voicemail
- If the call is to your personal extension, Reject will follow your “Forward when unanswered” rule.
- If the calls is from a Call Queue or another source, it will continue to attempt to dispatch the call as configured.

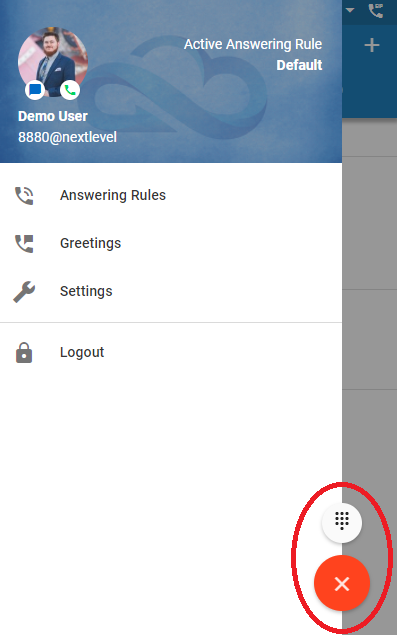
To make an outbound call you can click on the orange plus sign in the bottom right corner from any screen, then click the dial pad icon labelled New Call.
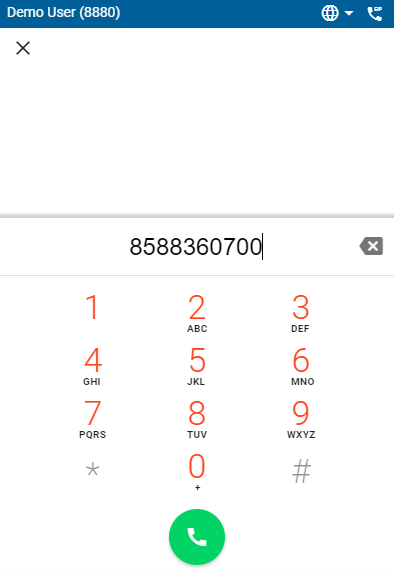
- Use the On-Screen dial pad or your keyboard to type in the extension number or the 11- or 10-digit phone number of the party you wish to call.
- You can also initiate a call from your Contacts, Voicemail, or Call History screens
- Click the green phone icon or press the Enter key to initiate the phone call.
Once on a call the screen will change to the Call Control screen.
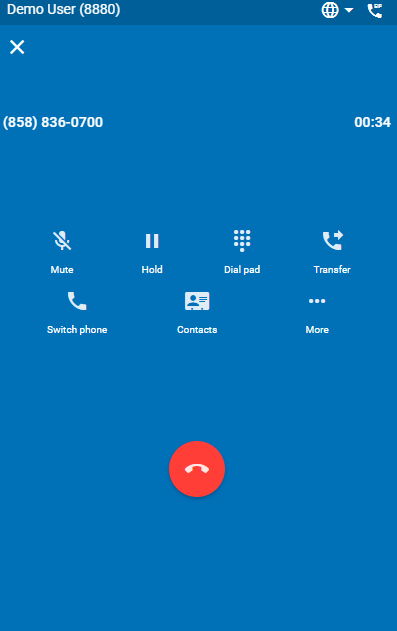
- Mute – temporarily mute your microphone. The icon will be highlighted to show that mute is active. Click again to unmute your microphone.
- Hold – place the caller on hold. They will hear music on hold. The icon will be highlighted to show you that hold is active. Click again to return the call to active.
- Dial pad – access the dial pad in cases where you need to enter a number (also known as DTMF)
- Transfer – bring up a dial prompt to “Choose from contacts” or “Dial a new number”
- If you click “Choose from contacts” you can scroll through your contacts or type in the search bar, select the contact, and click the phone icon on the right.
- If you click “Dial a new number” you can type on the keypad, click the green phone icon
- A pop-up will appear giving you the option to Blind Transfer or Assisted Transfer
- Blind Transfer will send the call off immediately
- Assisted Transfer will connect you to the new party first, and you will have the option to click Complete transfer to connect the caller to the new party
- Park Call – If you have Call Parks configured, this will bring up a list of Call Parks. click the P Icon to transfer the call to that Call Park.
- Switch Phone – bring up a menu of other phones that you have registered. Click to initiate a call to the other phone, and answer the other phone seamlessly move the call to the new phone.
- Contacts – minimizes the Call Control screen and accesses the Contacts list, where you can view contacts. This is for viewing only, if you want to transfer to your contacts do so by clicking the transfer icon from the Call Control screen.
- More options – bring up a menu with more options
- Record Call – begins recording the current call. Once clicked, the entire call will be recorded.
- Hide Call – hides the call, allowing you to navigate the WebPhone interface. Select “Return to call” at the top to access the Call Control screen
- To end a call, click the red phone icon on the Call Control screen.
Need more help with this?
Don’t hesitate to contact us here.